Monday, December 1, 2014

Eco Dyeing - Avocado - Tin Can

While traveling around the internet looking 

at some eco dye blogs; I had found a couple 

eco dyeing fabric around a veggie can

using various methods.


So I thought that I would try one.


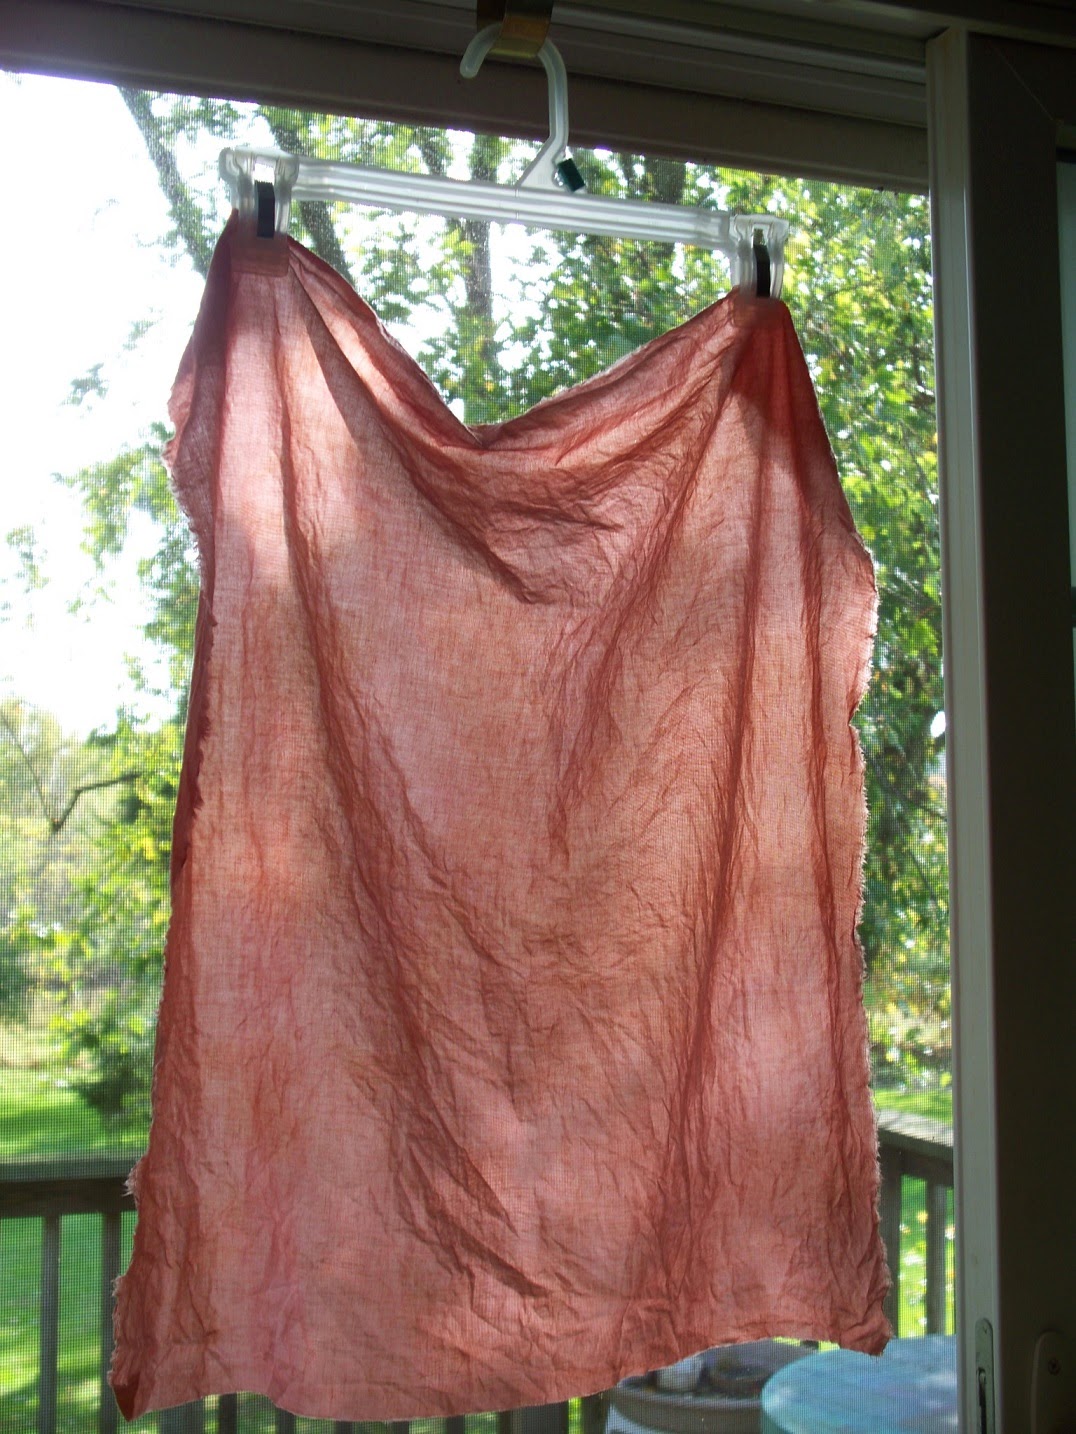
I had used the skin and the pit of an

avocado in a pot (stainless steel) and

covered with (tap) water. Heated for

about 2 hours and left overnight.

No modifier was added to the dye bath.

The cotton fabric that I used was 

treated with alum.

I have to say again that I'm not an

expert; I'm just playing and learning

along the way.

And I forgot to take photos of the can

once it was wrapped.

   I placed the fabric over the can

and placed yellow onions skins around.

I then wrapped Bamboo crochet yarn all

around the can -  tightly. (it's all that I had to wrap)

The can was placed into the avocado dye

bath and heated (not boiled) for about

2 hours and left it for a few hours 

coming back and turning it. 

When I unwrapped it I found it had 

a blackish ring in the middle. 

 The center ring is the only part

that was exposed to the can; the onion

skins covered the rest. 

We call them tin cans but when I googled

to see what our veggie cans are made 

of I found this:

http://www.keenforgreen.com/recycle/are_vegetable_cans_recyclable 

"Veggie cans are made from steel (though

often referred to as "tin cans" because 

there is a very thin coating of aluminum on 

the inside). "

Don't have the link to this:

"Tin" cans are actually made out of steel with tin plating. The tin is there to stop the food from reacting with the can itself
 (Steel cans with compromised tin platings can rust, leading to iron oxide contaminating the food, which makes it taste awful; this is
 why dented/bent cans are usually on discount, due to their shortened shelf-life)."


Now the reason I looked this up was

because of my next experiment with 

the can


This is a new veggie can that I had


just opened a couple of days before -

it's not old. 

There are no onion skins just one leaf

that I laid on the fabric and folded 

over and then wrapped around the can

- wrapped the yarn around all the way

around the can and fabric  and tied. 

You can see the yarn marks on this one.


You can see the vague print of the leaf.

But look at all of the blackish color

lines and marks - from the can itself.

Interesting... no?  I know very little

chemistry so I can't technically explain

it. 

 Although I don't like the way this piece

came out - I thought it was a failure but

then quickly thought - it's an experiment

and that I learned something from therefore

it's not a failure.


 I tried to get a close up and the 

black spots also have some deep purple

colors. Lots of little things going on

in there.

I'm thinking that I'm going to try

this method again.

I also have more avocado fabric to show

but I'll do that during the week.


Saturday, November 29, 2014

Eco Dyeing with Chestnut shells

This past Thanksgiving I had put some

chestnuts in the oven in my Corning

ware pie dish - with a little water.

When the timer went off; I removed 

the dish and discovered that the water

was brownish. oooh

I wondered if I could dye some fabric

with the shells...?

I searched google to see if anyone

had tried using the shells and to see

what they used and if they had good

results. - I couldn't find anything.

So... I put the shells in my stainless

steel pot and warmed the water (not boil-

Also, I used my tap water)

for about 1 hour and I started to see 

some color. 

Impatient that I am; I put a small piece

of fabric (already soaked in alum) in the

pot with the shells. 


I left it in the pot overnight.

Towards the afternoon

I

I removed the fabric - nice color!

I rinsed it off (not washed yet) 

and this is what it looks like.

 It looks like a deep tan or a 

light brown. So far I think it was

a success. I'll wait a couple of days

before I wash it to see how colorfast

it is. 

I find that I'm getting addicted to

this! 

Monday, November 24, 2014

Eco Dyeing with Pyracantha ‘Orange Glow’ Leaves Part 5

Eco Dyeing with Pyracantha ‘Orange Glow’ Leaves Part 5

My last post on this shrub (I promise)

Mostly photos of the results 

that I obtained using various

mordants and modifiers.

 (click on the photo for a larger view)

 I picked up some color paint samples

from Lowes - just to show the color

a little better.


By adding Alum to one dye bath and

fresh lemon juice to the other - you 

can see how it lightened the color.

Ammonia - a little mottled
 
Nothing in dye bath

And that concludes my experiments

with Pyracantha.

It will be interesting to see if 

the colors are the same in the Spring.

Tuesday, November 11, 2014

Eco Dyeing with Pyracantha ‘Orange Glow’ Berries Part 4

 Eco Dyeing with Pyracantha ‘Orange Glow’ Berries Part 4

 This is my 3rd experiment with the berries.


They are starting to wither because the weather is getting colder.

I cut them open and inside is a yellowish color and what appears to be a tiny seed.


The fabric that I decided to use is the one 


from the last berry experiment -

the one that turned out like a light beige


Boiled tap water (I decided to check with my

local Water Dept. and asked what chemicals 

are in the water - Answer - "We only add 

Chlorine and Fluoride to our water.")

and  alum placed the fabric in just for about


10 min.  -- rinsed.

Flattened the fabric on the table and placed


the berries on top

I then rolled the fabric and tied it.

It was steamed for about one hour - shut off


- then later on I decided to steam it again

for about one hour. 


Left it until the next day until it dried


Then unwrapped

You can see the pinkish color and all of 

the color is out of the berries.

Notice now the brownish marks on the left 


side of the cloth 


 In this photo you can clearly see the 

pinkish colors, from the outside of the 

berries, some yellow - from the inside 

of the berries and the brownish marks - 

I'm thinking that the brownish marks

are from the berries when all of the reddish 


color is heated out.

and as in the photo you can see the berries 


are now brown.

I can also detect some bluish/purplish 


spotted colors ...???


 This completely baffles me.

 Washed the fabric with woolite


pink and yellow washed out but

you can see the hint of blue


A very slight hue of pink, golds, beige 

and the light blue marks...???

As blue is a primary color; you can't

mix colors to achieve it. So this has

me scratching my head as to where this

color came from? Interesting....no?

I'm working on two more experiments

with the berries.... but I can tell

you so far -- the results are going

to be similar. 

I'm also working on more experimentation

with the leaves. I love the leaves! 

They give the most color.

Happy Dyeing!


Monday, November 10, 2014

Eco Dyeing with Pyracantha ‘Orange Glow’ Berries Part III


 Eco Dyeing with Pyracantha ‘Orange Glow’ Berries Part I 

Part I - is my first Berry experiment

http://materialisticvisions.blogspot.com/2014/10/autumn.html 


Eco Dyeing with Pyracantha ‘Orange Glow’ Leaves Part II 

Part II is experimenting with the leaves

 http
://materialisticvisions.blogspot.com/2014/11/eco-dyeing-with-pyracantha-orange-glow.html

This is Part III

Eco Dyeing with Pyracantha ‘Orange Glow’ Berries Part III


I am experimenting with the Berries

again.


I have to hurry and collect all of the

berries that I possibly can with the

cold weather approaching they are being

to shrivel. 

I put the berries in the stainless

steel pot and covered with my tap

water (which is hard). I added one

teaspoon of alum and let it simmer

not boil for one hour then let it

sit.

I forgot to take photos! ugh

I used 100% cotton fabric - one half

yard (no weighing) boiled it and added 

1 teas. washing soda and 1 teas. alum.

But here's the color in the jar...


Looks like a light orange. I let it

sit in the jar for about 5 days -

continually stirring it around.

Trying not to get too excited with

the lovely color because we know

by now - what you see is NOT what

you get!

I took the fabric out and rinsed it

in luke warm water and not surprising

the color came out and I would say 

it's a light beige. booo


So now I get this brainstorm! What if...

I put the liquid left from the leaves

and the liquid left from the berries

and see what happens.

I took one cup of the leaves liquid


 and added one cup of the berry liquid.

The cotton fabric boiled in soda ash

and alum, rinsed and put in the jar 

with the berry/leaves liquid mix.

 Fabric soaked for about

3 days. Dried the fabric and rinsed

and dried again.

This is the result


 It does have a hint of color.

(what's remaining in the jar is 

another experiment with white cotton 

DMC thread)

 You can see a hint of orange.

Here's the two results together


I'm beginning to wonder what the 

results would have been if I omitted

the soda ash in the fabric. 

I do have some berries left and

am thinking of trying something

different.

Stay tuned!
 

Tuesday, November 4, 2014

Eco Dyeing with Pyracantha ‘Orange Glow’ Leaves Part II

My previous post

 Eco Dyeing with Pyracantha ‘Orange Glow’ Berries 
Part I
http://materialisticvisions.blogspot.com/2014/10/autumn.html 

Pyracantha - is listed as an evergreen 

shrub - it has very sharp thorns.

This is a follow up with more 

experimentation. This time with the

leaves.


 Only this time I used a stainless

steel pot instead of the anodized 

aluminum that I used previously.

I started with the leaves


(maybe about 2 cups) I then added water

(this time I used my tap water)

just enough to cover the leaves. I 

heated the water, just one boil and 

lowered the heat and left it cooking

for about one hour. I added nothing 

to this liquid. Turned off the heat 

and left it soaking for about 24 hours.


 I then strained it -


ooh lala - see the paper towel! I have

high hopes for this one!


The fabric I used is 100% cotton

(fat quarter size)  that

I boiled and then added 1 teaspoon

of alum.

I then put all of this in a jar...


I left it on the window sill for 


about one week.

 Took the fabric out of the jar

and rinsed it in warm water. I then

used woolite to wash.


Now I'm even more excited because

the color is NOT washing out! Yeah!


Here is the fabric hanging on my

curtain rod drying. Looks good!

 Trying to get a good photo of the

color but in each photo the color

looks different.


 I think I would call it a pumpkin 

orange leaning to the brown side.


And here it is ironed - the color

stayed the same. With some other 

experiments I had the color change

as soon as the iron hit it. 

The only other test I would like to

do with this piece is a light test - 

by exposing a square to the sunlight

and enclosing the rest of the fabric

with two card board pieces. I will

leave it in the sunlight for a couple

of days and see what happens. Hopefully

it will pass the test.

I am very happy with the results! 

It will be interesting to do this

experiment again in the spring just

to see if there is a difference in

color. In the spring the Pyracantha

has white flowers - the berries come

out in the fall.

My next post will be about the 

berries that were on this vine -

I'm redoing the experiment again.


Monday, October 20, 2014

Eco Dyeing - Cleome

Cleome - sometimes called Spider Flower


What's so great about these plants

is that they self seed. 

Those little pods you see hanging

contain the seeds. 

About 2 weeks ago I started saving

some of these seeds for my daughter

to plant in her garden. 

Looking at the Cleomes; I wondered if I

could extract any dye from the purple 

colored flowers.

But first I google them to make sure

they are safe and not poisonous in 

any way.  Surprisingly, I found that

they are called an Herb and used

medicinally! This is truly an amazing

and versatile plant! 

To my amazement I didn't find through

my google search anyone who had used

this plant for dyeing. Not that I could

find with photos anyway.


I put the flower heads in the pot and covered

with water and heated not boiled for about 


one hour. The liquid looked purple.

                                                    (Kitchenaid - anodized aluminum)
(Edited - Using this pot was a mistake  - I realized that when I did
another experiment with the  Pyracantha ‘Orange Glow’in my previous
post - which by the way I'm doing a second time using a Stainless Steel
pot instead - It has made a huge difference!)

1- 100% cotton fabric soaked in hot salted water then rinsed

I poured the purplish colored liquid in a


small tupperware and added the wet fabric -

I then cut  a lemon in half (no measurement)

and just squeezed a few drops into the

liquid and stirred it around it turned Pink!

(I keep forgetting to take step by step photos!)
  
2 - 100% cotton fabric 

The second piece of cotton fabric I soaked 


in hot salted water then rinsed

I poured some of the pink liquid in a small


tupperware and added maybe 1/4 teas. of alum

and added the fabric. It didn't look like

anything changed so I added a couple of

drops of ammonia and it turned purple...?


I let the fabrics soak in the liquid

for about 2 days. Took them out and

rinsed in cold water. I did not wash

them in a detergent yet because I wanted

to find a natural detergent for them.

Here's what they look after they dried


A nice shade of pink the other is

like a greyish purple.

Now for the third experiment

3- 100% cotton fabric - nothing added
was just washed.

I poured some of this same purplish liquid

into yet another small tupperware added the

fabric - stirred it around and then added a

couple of drops of ammonia and it turned

Green! 


Here's the results along with the pink.


The purplish cloth is such an odd

color - it looks grey, purplish and

I can see some pink.


Today I washed the fabrics above with a 


light colorless detergent and I was so

disappointed that the pink changed ....


to a minty green color. 


The original green stayed green after

washing. And the purplish grey also

turned....


A greenish blue. As you can tell I

haven't ironed the fabrics yet. My 

next test with these fabrics will be

what happens when they are exposed to

sunlight for a long period.

It would be interesting to try different

mordants and see the results.

I won't be able to do this experiment again

until next year - no more Cleome flowers.


I hope that someone who is more experienced

than I am will try using the Cleome plant.

Perhaps, they can coax more vibrant colors

than I did and maybe some new ones!  If you 

try this please let me know your results!


Notes:

After I tried my experiment with the Purple Cleome -

I found some interesting facts about this plant!

 " If you boil it down enough, you end up with a black syrup, quite thick, which acts as a binding agent for pigments, ideal for painting on unfired pottery."


" Native American recipes in fact have Cleome cooked, most frequently boiled, often eaten like spinach, or the seeds, which are often eaten raw, boiled into a porridge-like mush. Seeds are also sometimes ground into a flour or meal, and has been used for bread since prehistoric times."

You can read more here
Read Here

Happy Dyeing!